"Is my image good enough to make into a poster" is the most common question people have when they want to make a custom poster.
I know because I have helped close to a million customers turn their pictures into posters over the last 12 years.
Some of them have been famous photographers. Most are not photographers at all and have important pictures they want turned into a poster print.
Whether you are a begginer or a pro, this guide will help you turn your pictures into custom posters that make you happy.
But if you're ready to make a poster now, you can make a poster here.
Or if you'd rather see videos of how we make posters, you can see that here.
But if you want to learn about poster printing, lets get started…
- Determine Your Image Quality
- Determine the Aspect Ratio and Print Size
- Choose a Paper Type (Gloss vs Matte)
- Should You Make Your Poster Borderless
- Laminating Your Poster
- Framing Your Poster
- Shipping a Poster
- Making a Collage with Multiple Images
- Adding Text to Your Poster
- Advanced Customization
- Using Templates
- Using Photoshop and Lightroom
1. Determine Your Image Quality
Figuring out how well an image will print at a large size can be confusing.
But with this blog post, you can do it. And if you're still not sure at the end, you can always email us and we'll check out the image for you.
Non-Technical Guidelines
If your image was taken on a modern cell phone and the picture is in focus, you should be able to go up to 40 x 60 inches and the print will look great.
Modern cell phone cameras are really good.
If you have a DSLR camera, you should also be able to go up to 40x60 inches without any problem.
If You Didn't Take the Photo
If your image was downloaded online from a site like Facebook, other social network, Pixabay, or anywhere else, this is where it gets a little more tricky and you’ll need to check the image dimensions.
You can find the dimensions of your image on whatever pc or mobile using this short guide, or you can check your image dimensions by using our image size checking tool below - or visiting our image size finder page.
Upload Your Image - Find Your Image Size
Files types accepted: .jpg, .jpeg, .png, .bmp.
Image Size Guidelines
If your image is over 2000 pixels on each side, you are probably good at almost any size.
If your image is over 1000 pixels on each side, you are good to print 24 x 36 inches or smaller.
If your image is over 500 pixels on each side, you can probably run super resolution on your image and get it to print at 24x36 or smaller.
If your image is under 500 pixels on either side, its best to contact us to see if we can improve the image. Often times we can do amazing things with tiny images. Or you can try out free super resolution tool to enlarge and enhance your image.
Here is a more in depth blog post on choosing the right print size for your image if you’d like to learn more.
2. Determine Image Aspect Ratio and Print Size
Both your image and the print size you choose have an aspect ratio and the closer they match, the easier making your poster will be.
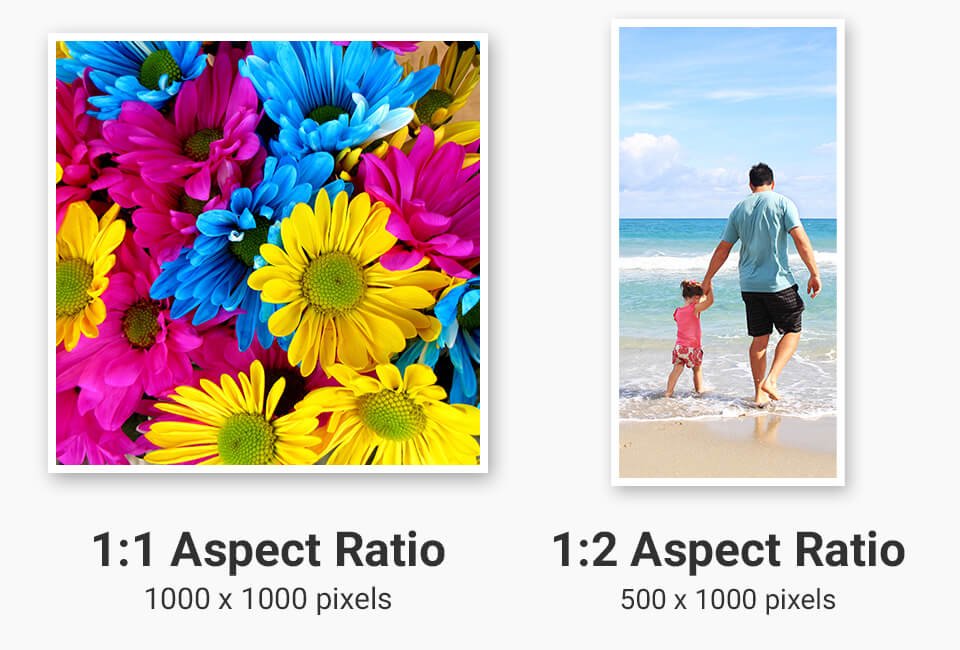
The short explanation is that your image has a ratio between the height and width and the print size you choose has a ratio between the height and width.
The closer those two ratios are, the less problems you run into when printing a poster.
The best case scenario is when you can pick the print size based off the image size. You can use our image aspect ratio tool here to find the sizes that fit your image best.
If you need the poster to be a certain size – because you already have a frame or need to fill a specific space – then you’ll want to customize your image.
You’ll have three options: Cropping your image, adding black bars, or stretching your image.
Cropping Your Image
With cropping, you will remove parts of the image to make it fit the print size.
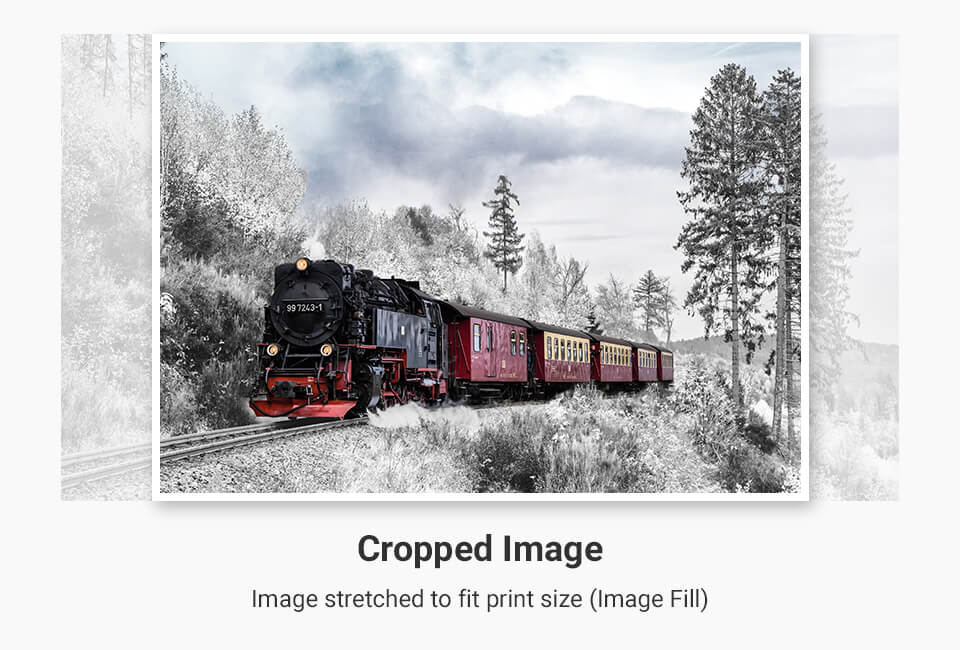
The downside of cropping is it won’t work if there are important elements of the photo near the edges that need to be cropped.
Adding Black Bars
If cropping your image doesn’t work, adding black bars is another option. Below is an image of what a poster looks like with black bars added.
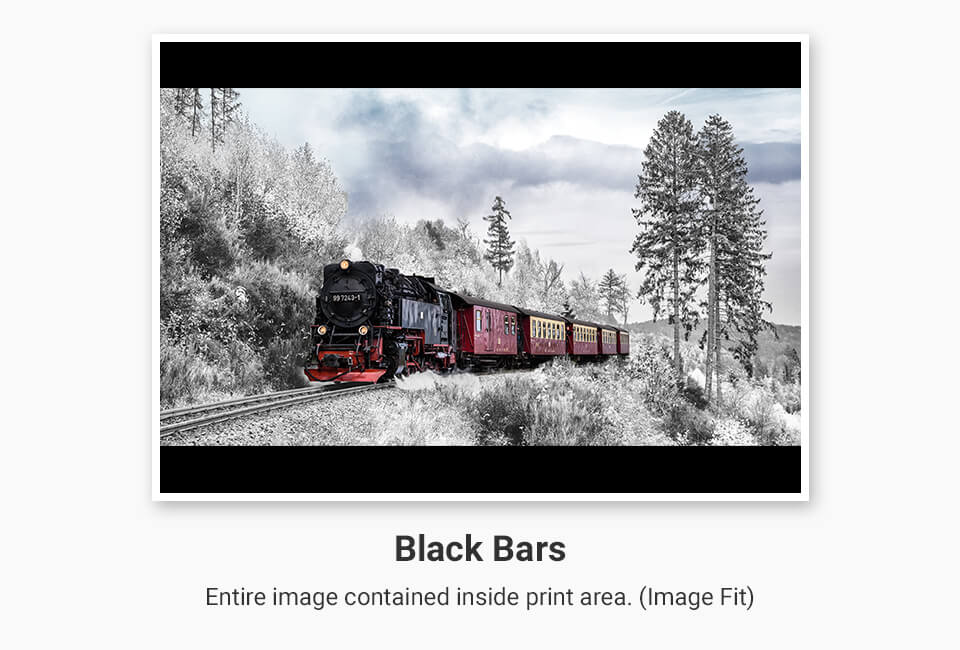
Adding black bars to the print allows you to fit images that wouldn’t otherwise fit the poster without having to crop or remove any of the image.
Stretching the Image
The final option is to stretch the image horizontally or vertically.
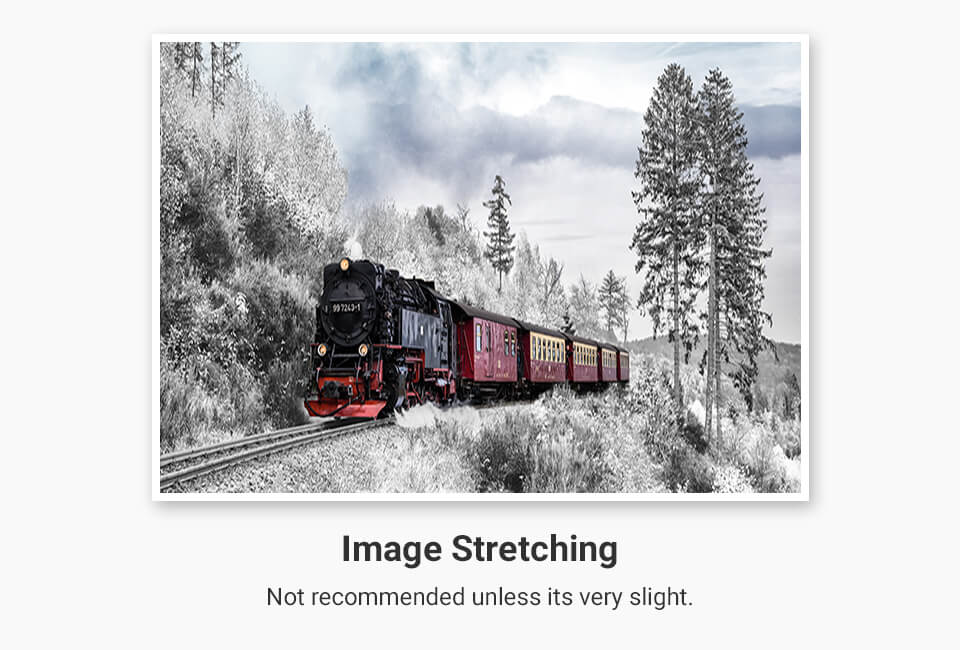
This is only recommended if it’s a very minor stretch because stretching becomes very noticeable and odd looking if its overdone.
You can go here for a full detailed guide on image aspect ratio and print size.
3. Choose a Paper Type
When making a poster, you will need to choose between Gloss or Matte paper.
Gloss Paper
Gloss is the most popular option and if you’re not sure which paper type you want, we recommend going with gloss.
Gloss paper is generally what people think of when they say "poster paper."
Gloss will have more vivid colors and display best in even lightening conditions.
Matte Paper
Matte paper has a shine free finish that creates depth and detail.
Matte is popular with artistic style prints or when the poster will be displayed in uneven or hard lighting conditions.
Matte is also the most popular option when framing a poster. Gloss posters are also commonly framed but matte paper is easier for framers to work with and has zero glare making it the preferred option for framed prints.
For more information on paper types please see our guide on the difference between gloss and matte poster paper.
4. Should you make your poster borderless?
Borderless posters are a popular option and there is some confusion about how it works.
The printer models that print the highest quality posters cannot print to the very edge of the poser. They leave a tiny 3 millimeter border (1/10th of an inch) on each side of the poster.
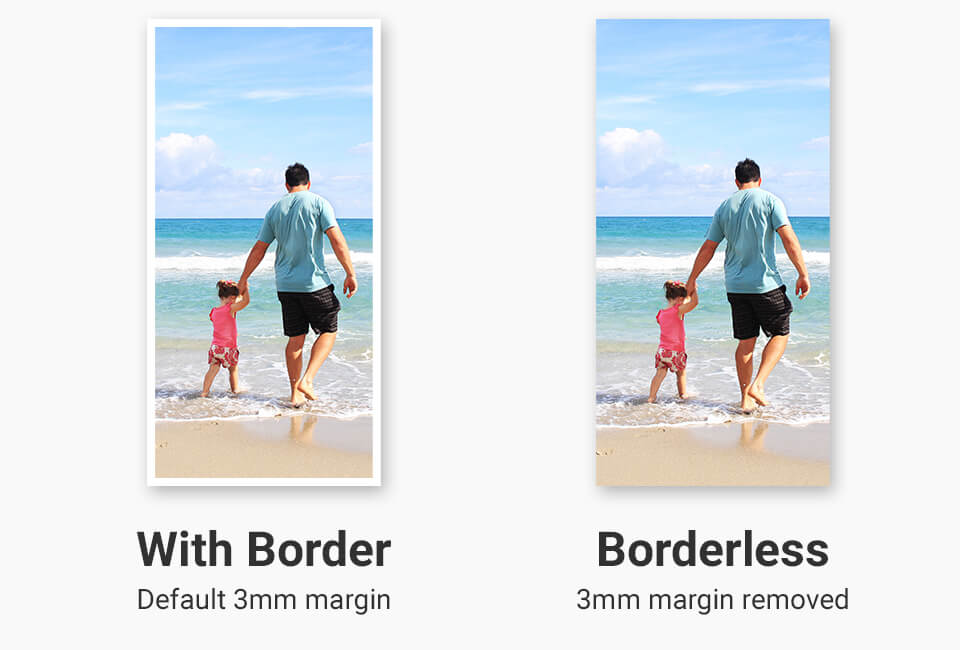
If you decide you want a borderless custom poster, we print it normally and then cut the 3mm border off. So your poster will be 6mm or roughly 2/10ths of an inch smaller on each side if you choose borderless.
The size difference from trimming the border is usually unnoticeable.
However, we do not recommend selecting the borderless option if you are framing your print.
The variable nature of the cut will making getting the exact right size for a frame nearly impossible.
5. Laminating Your Poster
We offer an option to laminate your poster. Lamination is great to protect the poster from the elements, scratches, and general damage.
Lamination is popular for school posters, outdoor poster displays, and posters that will be in high traffic areas.
Here is how we laminate a poster:
6. Framing your poster
Whether it’s with our poster framing service or a local framing shop, a significant percentage of posters end up being framed.
When framing a poster with us or a third party, there are a few things you want to consider.
First, you want to make sure very important details of the photo or artwork are not at the very edges of the poster.
Many frames have small lips that will cover a slight portion of the poster. You don’t want text at the very edge of a poster getting cut off by the frame.
Second, you don’t want to print borderless (unless you are matting your image).
If you are going to have matting in your frame, we offer an option in our customize tool to add a border around the image. You can see how it works below:
Frames can really increase the display quality of your poster print and should always be considered as an option.
7. Shipping Poster Prints
We have tried every way possible to ship a poster, and we have found the best way is using a kraft mailing tube.
Mailing tubes have the lowest damage rate, and protect the poster from damage. We also put a poly bag inside the tube to protect against weather.
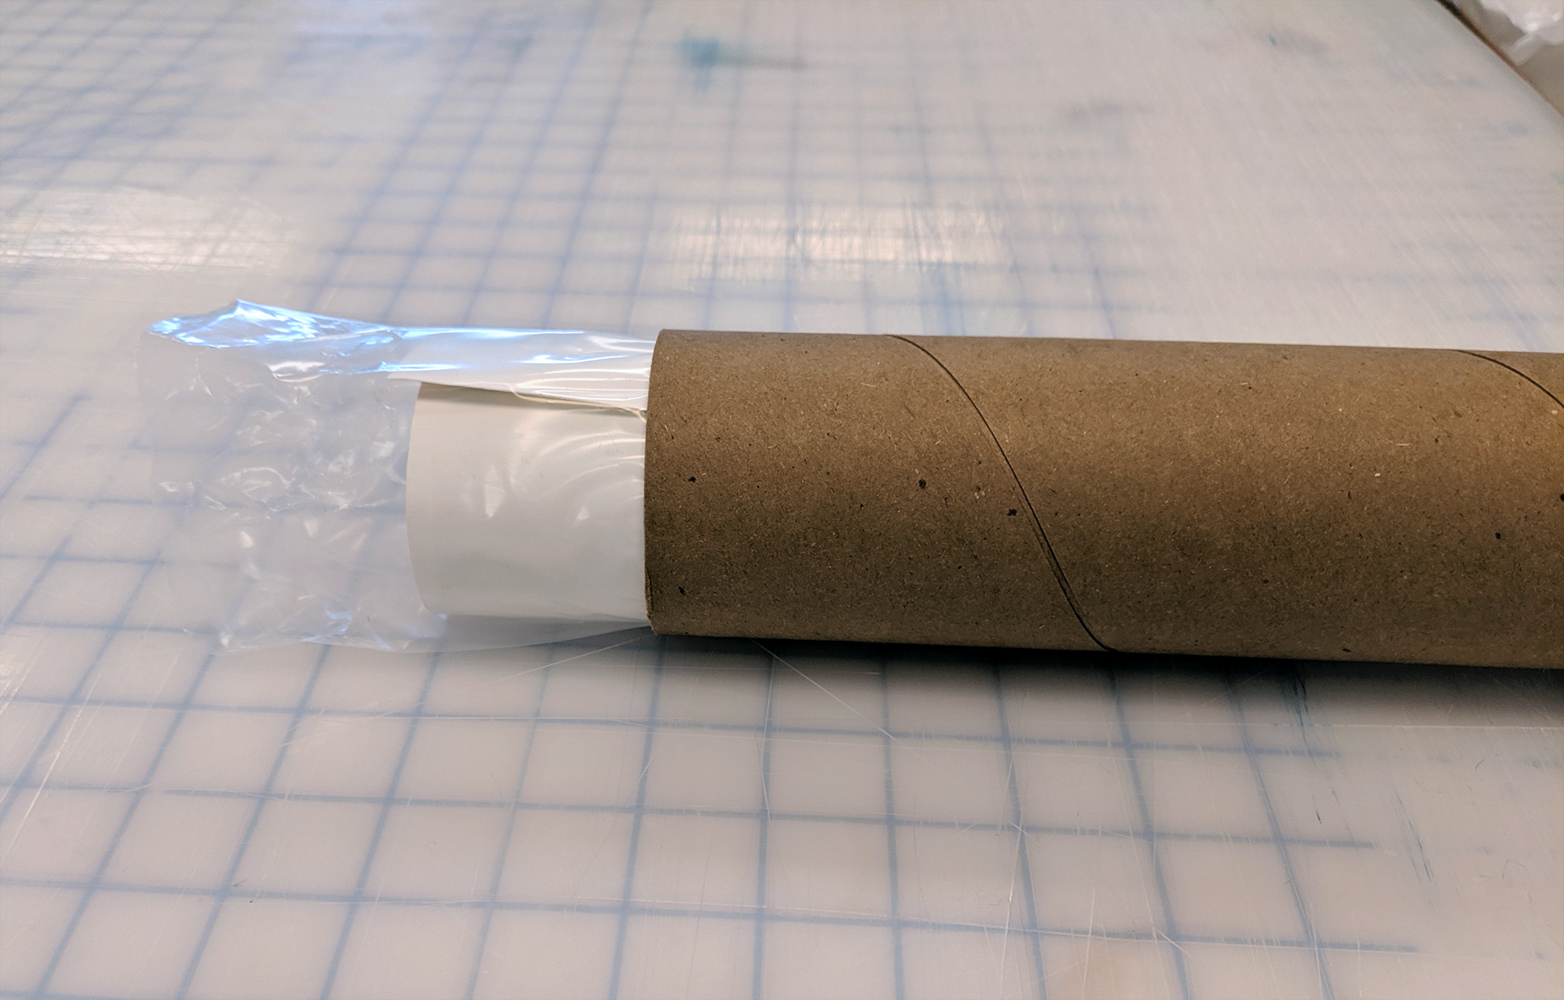
Some other methods we have tried are shipping them flat and triangle tubes. But we found these methods didn’t work as well as the tubes.
You can visit our shipping a poster information page to find out more about transit times if you order a PosterBurner poster.
8. Making a Collage with Multiple Images
Making a collage with many images is easy with our customize tool. There is also no additional charge to use multiple images to make your poster.
Simply upload multiple images on the make a poster page, and then click continue.
You will load into our customize tool where you can do an auto collage layout, drag your images to where you want them, and add text if you like.
Here is a video on how to make a collage poster:
9. Adding Text to Your Poster
To add text to your custom poster, click the customize option and go to our customize tool.
In the customize tool follow the steps in the video below:
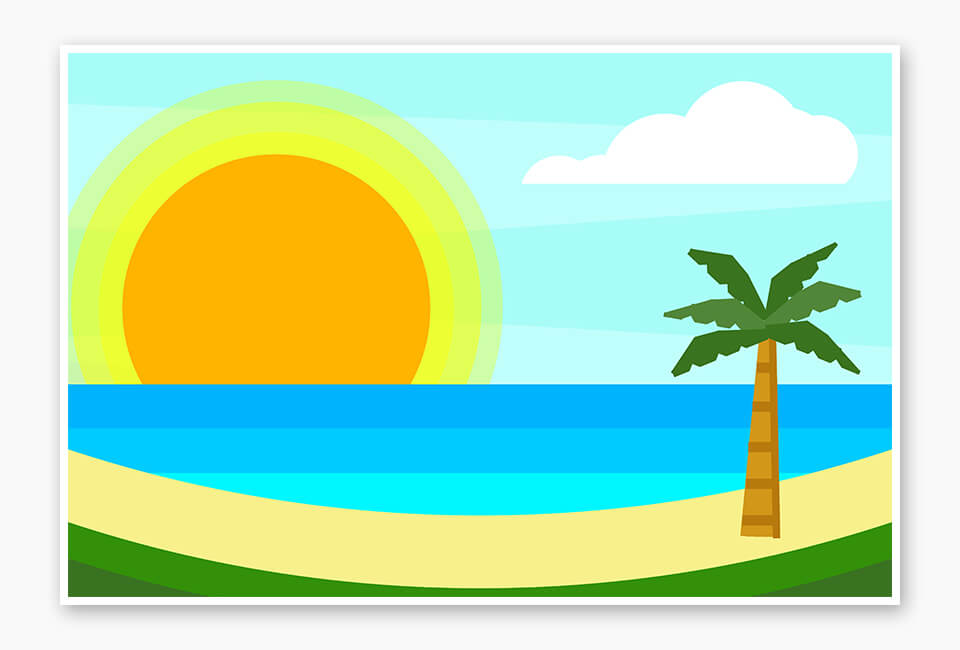
10. Advanced Customization
With a little bit of creativity you can create even more intricate designs using our customize tool. By combining shapes like circles and rectangles, altering their color, rotation, and transparency, you can create truly professional looking poster designs.
The example poster below was designed entirely within the PosterBurner Customize Tool using custom shapes.
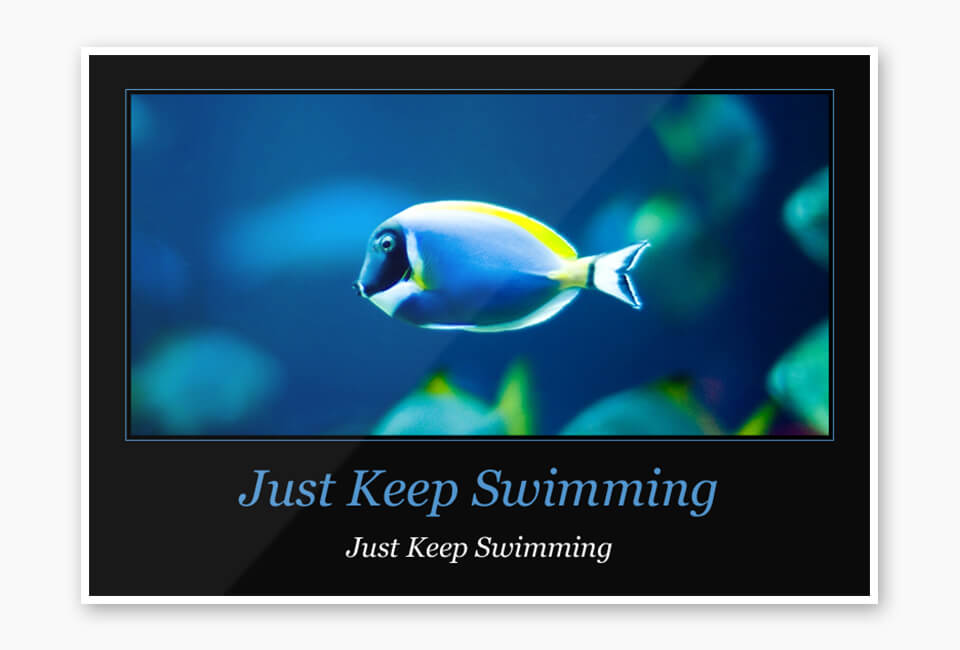
11. Using Templates
Our Customize Tool currently offers one Template design option.
The Motivational Template is extremely popular template with our customers and has been used for everything from motivational slogans for the office, touching family tributes, and even hilarious memes.
Selecting this template will apply a rectangular mask with a colored border, large title text, and a smaller description text.
You can click on the sample text to input your own title and description.
12. Using Photoshop and Lightroom to Make a Poster
There are an unlimited number of improvements you can make to your image using Adobe Lightroom and Adobe Photoshop. The most important factor in making sure your colors are correct is to calibrate your display so it is displaying the correct colors.
When using Lightroom to prepare your image for a poster we recommend first balancing the color. You do this by selecting the White Balance tool (it is an eye dropper icon in the Basic Panel, hotkey “W”) and then clicking on the whitest, or most neutral, part of your image.
This will give you a readout of values for the Red, Green, and Blue pixels and then average those three numbers so they are the same or as close to the same as possible. This will accomplish your color correction, from there you can adjust the Tone, Contrast, and Brightness of the image to your liking.
When using Photoshop you can achieve nearly perfect color correction by clicking three easy buttons.
Cick the “Image” tab in the header, select “Auto Tone”, then “Auto Contrast” and then “Auto Color.” That’s it. Your image is now color corrected.
Another helpful technique is to adjust the Levels graph to make sure your color transitions are smooth and crisp. To do this click the “Image” tab, then “Adjustments”, then “Levels.” This will open an graph with three knobs along the bottom. To correct the levels just make sure the knobs on each end are moved to the position where the graph begins. If there is a gap between the knob and start, or end, of the graph it will give the image a washed out look, this will correct that imbalance.
Did We Leave Anything Out?
Let us know if this post was helpful.
Also let us know if you have any unanswered questions about making a custom poster.
You can always contact PosterBurner if you need anything at all.